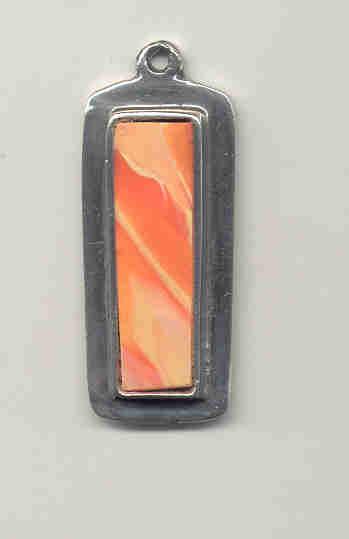
Orangesicle Joy Necklace Pendent
This project from Amate Studios is almost ready to eat! Using a metal blank as a base and adding a touch of marbled polymer clay creates a one of a kind pendant for your necklace.

Materials:
- Amate Studios Long Rectangle Pendant (lipped)
- Polymer clay pearl and orange
- Dedicated pasta machine or roller
- Clay knife
- File
- Dazzle Tac Jewelry glue
- Baking tray
- Oven
- Necklace of your choice
Instructions:
- Condition about a quarter size of the pearl and orange polymer clay together to get a peach color. Condition a quarter size of pearl and orange clay separately.
- At this point you should have three separate pieces of clay. Run each piece though the pasta machine on setting 4.
- Run each piece through the pasta machine side by side so that each color is overlapping about 1/2 inch. Once the clay is all the way through fold the clay in half, at an angle so that the same color is not overlapping each other.
- When you have the marbled look that you want, fold the clay over to get a final depth of about 1/8 of an inch.
- Take the pendant turn it upside down and make an indent in the clay. Remove pendant. If the pendant did not cut all the way through the clay use a clay knife to finish cutting the clay. Smooth out the edges with your fingers.
- Bake clay according to the directions on the clay package. Allow to cool before touching.
- Before you glue the clay to the pendant make sure that it fits into the pendant correctly. If it does not fit use a file to help make it fit.
- Use the tip of the Dazzle Tac jewelry glue to help smear a thin layer of glue on the bottom of the pendant. Insert the clay into the pendant and let it dry.
See all the different pendants available for this project at www.amatestudios.com
Read NextIdeas for Polymer Clay Canes

