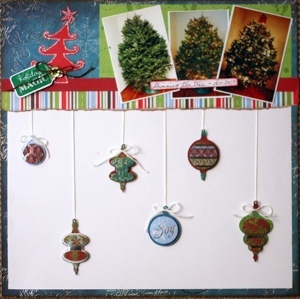
Holiday Magic Scrapbook Layout
Use the magic of Christmas to inspire your creativity with these free scrapbook layout ideas. The holiday magic scrapbook layout is just as much about showing off your photos as it is about celebrating the magic of the holiday season.

Materials:
- Studio Basics 101 Patterned Paper (22166, 22164, 22184)
- Teri Martin Patterned Paper (24877, 24857)
- Melange Merry & Bright Layered Sticker Sheet (21761)
- Studio basics 101 Sticker Sheet (22186)
- White Cardstock (1 sheet)
- Red and Brown Ink
- White Floss
- Brown Floss
- 1 Button
- Stardust Stickles
- Pop Dots
Instructions:
- Use dark blue patterned with silver foil accents as the background. Cut white cardstock to 11 ½” x 8” and adhere to the bottom of the layout, leaving a 1/8” border around the edges. Adhere 6 varying lengths of white flow to the white cardstock and affix ornament stickers to the bottom of each. Add floss bows, if desired.

- Cut 1 12” x 1 ½” strip of striped paper; tear bottom edge and then ink the edges with brown ink. Adhere to the top of white cardstock. Cut a 12” x ½” strip from the center of the red patterned paper with gold accents to get a plain red strip. Adhere to the top of the striped paper. Cut a tree from the red Studio Basics patterned paper; adhere to the upper left corner. Affix “Holiday Magic” sticker to white cardstock and trim, leaving a 1/8” border. Add button and floss to the sticker and adhere to the tree using pop dots.

- Cut a 7 ¾” x 3” strip from green patterned paper. Adhere to the top right corner, leaving a 1/8” border along the top and right side. Add stickles to the tree and title sticker.

- Adhere 3 wallet size photos to the green patterned paper strip. Ink the edge of the layout with brown ink. Write journaling on white cardstock strips and ink with red ink. Adhere to photos using pop dots.
Read NextVintage Wedding Day Scrapbook Layout

