Smooch Spritz Background
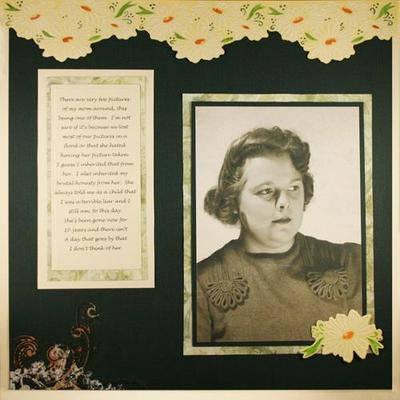
If you're looking to preserve your memories with artistic flair, check out these scrapbook layout ideas. The Smooch Spritz Background is made with pretty opalescent spray and will make for perfect scrapbook background.

Materials:
Clearsnap Products:
- Top Boss Black Embossing Powder
- Top Boss Clear Thick Embossing Powder
- Top Boss Watermark Embossing Ink Pad
- Top Boss Watermark Ink Cartridge
- Cosmic Pink Smooch Spritz
- Cherry Ice Smooch Spritz
- Silver Foil Smooch Spritz
- Black Colorbox Pigment Stamp Pad Full Size
- Chianti Colorbox Pigment Stamp Pad Full Size
- Black Colorbox Pigment Brush Pad
- French Swirl Designer Adhesives
- Silver Fog Designer Foils
- Jumbo Rollagraph Handle
- Coal Black Ancient Page Ink Cartridge
- WordWords Design Wheel
Other Products:
- Hot Off the Press Edge and Border
- Daisyd's Rub-Ons
- Heidi Grace Rub-Ons
- Spare Parts Filigree Brads
- JoAnn Essential Key
- Misc. Silk Flowers
Instructions:
- For this layout, I used the Jumbo Rollagraph using the "WordWords" design wheel and Watermark Ink Cartridge. Roll the Rollagraph vertically along the side of the paper.

- Immediately after stamping the image, sprinkle with Top Boss Thick Clear Embossing Powder over the stamped image. If you are using a tidy tray, gently tap the corner of the box on the tray to remove all the excess embossing powder. A folded piece of paper works just a well. If any stray bits of embossing powder still remain on the surrounding image,use a small paint brush to gently remove the stray embossing powder.

- Holding a heat gun approximately six inches from the paper, sweep backwards and forwards until the Top Boss Clear Thick Embossing Powder starts melting. Do not over heat the image with the heat gun because the embossing powder will burn. Continue to repeat the stamping using the Rollagraph on the other side of paper.

- Gently shake the Cosmic Pink, Silver Foil and Cherry Ice Smooch Spritz to make sure the mica is mixed completely with the ink. Holding your Smooch Spritz just a few inches from the inked paper, spray and coat the paper with a layer of Smooch. No worry, if there are droplets of the spray on the paper as they will be blended into the background in a future step.

- Carefully peel off the backing of the French Swirl Design Adhesives and place on the page.

- Lay a piece of Silver Fog Designer Foil, shiny side up, on to the Designer Adhesive. Gently rub and smooth the Designer Foil with your fingers to press it into the Designer Adhesive image. Gently peel the foil sheet away from the page.


- Using the Jumbo Rollagraph WordWords Design Wheel and Coal Black Ink Cartridge, roll the Rollagraph vertically along the right and left side of the page.

- Tap the Stylus Tips blending tool on the Chianti Colorbox Pigment Stamp Pad to pick up a small amount of ink. Now using the Stylus Tips blending tool, blend the Pigment ink and Smooch Spritz into the paper. Make sure you blend the embossed area with more pressure to apply more ink around the heat embossed area created in step three. This will create a stark contrast between the embossed area, which will resist the Pigment Ink, and the inked area of the page.

- Aggressively run a paper distressing tool over the edges of the page. Once the edges have been distressed with the tool, ink the edges with Black Colorbox Pigment Ink Brush Pad.

- Place a double matted photo on the page but do not adhere. Using a pencil, draw a box around the photo to mark its placement on the page and then set the photo aside. Stamp a flourish image using Top Boss Watermark Ink pad directly above and below where the photo will be placed on the page. Sprinkle with Top Boss Black Embossing Powder. Follow the embossing instructions in step two and step three listed above.

- Adhere the decorative crystal flourishes, decorative brads, silk flowers,rub-ons and metal title. I changed the color of the folded flowers by spritzing with Smooch Spritz. I also embossed the metal title with Top Boss Black Embossing Powder "Hope"

Read NextMom Scrapbook Layout

