Sewn Pillow Case
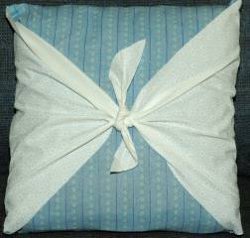
Take a load off and curl up with this Sewn Pillow Case. This sewing pattern from Debbie Madson looks great and is perfect for beginners.

Materials:
-
1 yard of two different kinds of material (find material with patterns and colors that coordinates together)
- 15 x15 inch pillow form
Instructions:
-
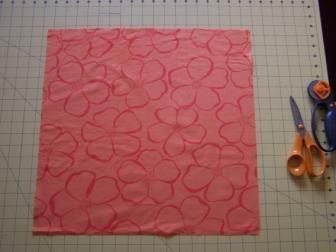
Cut your material in the following sizes: 2- 16x16 inch squares from 2 different coordinating material, 16 x16 inch square for the front, 16 x17 inch squares for back of each pillow whichever material you want on the backside.

-
On one of your two 16x16 inch squares use a ruler to make a large isosceles triangle by placing the ruler in the bottom corner. Draw a line to the middle point (8 inches). Cut out your two triangles. Turn the side edges over 1/4 inch and sew a hem.
-
For backing, cut 16x17 inch square in half lengthwise. Turn long edge down on a rectangle and sew. Pin if needed. Continue with other rectangle. Set aside.

-
Pin one of the triangles to the front of your pillowcase right side up. Pin other triangle to opposite side. Sew each side. Make sure the tips of your triangles won't get caught in the seam.

-
Now pin the backing on top of the front. The two pieces of the backing will overlap.

-
If you find your edges don't match up trim the excess. Sew along edges taking out the pins as you go. Turn right side out. Place pillow form through opening in back. Tie two triangle pieces together.

Read NextRepurposed Bedspread DIY Hand Towels

