Quick and Easy Wired Ribbon Bow Tutorial
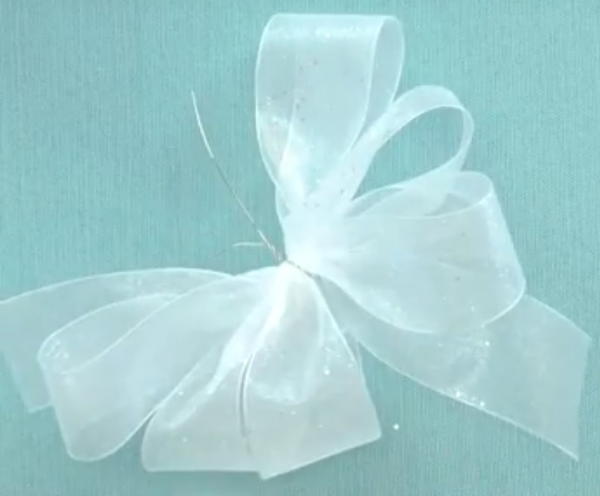
Make a wired ribbon bow easily. This is a fantastic video tutorial for beginners because you can easily customize how large or small you'd like the bow to be. To make this tutorial, you only need to master a basic technique. This type of bow can be made using a variety of types of ribbon, but it does work best if the ribbon is wired because that holds the shape better. Make wired ribbon bows for wreaths, gift wrap purposes, floral arrangements, or any other crafts you'd like.
Estimated CostUnder $10
Time to CompleteUnder an hour
Primary TechniqueGeneral Crafts

Project TypeLearn a Technique
Materials List
- Wired Ribbon
- Piece of wire or pipe cleaner
Instructions
-
Decide how wide you want your bow to be. If for example you want your bow to be about four inches wide, place your finger about two inches from the end of your ribbon. That is your midway point.
-
Create a loop with the ribbon pattern facing right side out. Pinch the loop shut in the center of the bow.
-
Twist your ribbon. This ensures your pretty side is always showing.
-
Create another loop on the opposite side of the ribbon. Make sure to pinch each new loop in the middle.
-
Create as many loops as you'd like. Make sure you have the same number of loops on each side of the middle. In the video example, there are three loops on each side.
-
Secure the middle tightly with a length of wire. Once the middle is secured, fluff out the loops.
-
Optional: wrap a length of ribbon around the wire in the middle to polish off the look.



![Pill Bottle Crafts: Reuse Pill Bottles [15 Ideas]](http://irepo.primecp.com/2017/06/334076/PILL-BOTTLE-CRAFTS-Header_Category-CategoryPageDefault_ID-2274135.jpg?v=2274135)


