Scrappy Fabric Bookmark
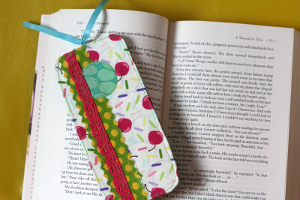
 If you’ve been itching for a creative way to use up your assortment of fabric scraps, you’re going to love this cute Scrappy Fabric Bookmark. This adorable scrap buster project is made with a variety of odds and ends, and it makes a great stocking stuffer idea for the bookworm in your life. You could even personalize the back of the bookmark with a special message if you wanted. This easy sewing project is fun for crafters of all ages, and is a great way to put those fabric scraps to use in a quick and easy way.
You can find this project, and many more, in our new eBook, Homemade Christmas Gifts: 14 Gift Ideas & DIY Home Decor! Download your own free copy today!

Materials:
- ScanNCut Machine
- Variety of fabric scraps
- Embellishments
- Ribbon
- Fusible interfacing
- Pins
- Scissors
- Fabric Safe Glue Stick
Instructions:
- Lay a scrap piece of fabric that measures at least 5.5” x 11” on the purple fabric cutting mat. Press down well and load into ScanNCut. Check your blade setting for the fabric you are using.

- From the built in shapes in the machine select the square with rounded edges shape and adjust the measurements to measure 3” wide x 6.5” long. Add ¼” seam allowance to it by selecting the seam allowance icon on the bottom left of the screen.

- Drag shape on screen with stylus to the area of the mat with the fabric on it.

- Select “Cut” and then the “Start/Stop” button.

- Peel off rounded rectangle and set aside.
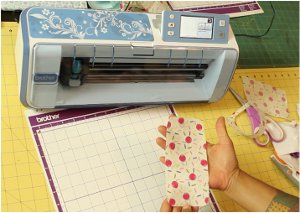
- Repeat Steps 1-5 on the same or coordinating fabric. The two rounded rectangles will be the front and back of bookmark.

- Lay a scrap piece of fabric that measures about 3” x 12” on purple mat and press down ensuring no puckers or bubbles in the fabric.

- From the main menu select the icon on the bottom left to cut long, thin designs.

- Navigate to Page 3 and select the first design on the page.

- Change measurements to 1.36” height (the lowest the machine will let you select for this design) and 10” in length.

- Select the third icon from the left on the bottom of screen to orient the design correctly based on how you laid your fabric strip down onto the mat.

- Click to turn the design 90º to the right to get a vertical strip that matches the fabric orientation.

- Pick up and move the design on screen so it lines up with where your fabric is on the mat and cut out the design.

- Peel away excess fabric and set your decorative strip aside.

- Lay a scrap piece of fabric that measures at least 3” x 4” on the purple fabric cutting mat. Press down fabric and make sure it’s flat. Load mat into machine. Check your blade setting for the fabric you are using.

- Select a circle design from the pattern menu and cut it out at 1.5” in diameter. Peel up from mat and set aside.

- Play around with your cut outs by layering them until you have a design you are happy with.

- Adhere each fabric piece on top of background fabric using a fabric safe glue stick or pins. Trim away any excess so everything is flush with sides of background fabric.

- Fuse the back and front pieces to a lightweight or medium weight interfacing. Then trim away any excess interfacing following the curved sides of the fabric.

- Add any other embellishment to the front of the bookmark.

- Machine appliqué your design by stitching every motif down using straight or decorative stitches.

- Cut a 10” long piece of ribbon and fold it in half. Lay the fold in the ribbon about ¼” up from the center front of the bookmark and pin in place. Making sure to have the raw edges of the ribbon laying on the front of the bookmark.

- Lay one on top of the other with pretty sides of the fabric touching and pin around. Note: You should be able to see a little bit of the folded ribbon at the top.

- Using a straight stitch sew up all around the sides leaving a small opening on one of the straight sides of the bookmark. Remember to back stitch at the beginning and end to ensure the seam doesn’t unravel on you when you go to turn it inside out.

- Carefully turn bookmark right side out through opening. Press everything in place with a warm iron. Feel free to starch if you need to get rid of some wrinkles.

- Top stitch all the way around the bookmark staying about 1/8” away from the edge. Tie a knot at the top of the ribbon and use a lighter to melt the edges of your ribbon so they edges don’t fray.

- That’s it! Enjoy your bookmark or give it away to a bookworm in your life!
Bronze Hazel
Feb 03, 2017
This seems to be more of a tutorial on how to use a ScanNCut machine, but it has given me some ideas on how to make these bookmarks nonetheless. I won't be investing in a ScnNCut, but I can see no reason not to try making these by hand. They'd make lovely gifts for bookworms )
JMitchell
Oct 15, 2013
Apparently the tutorial for the bookmark is only in the ebook - which I really don't need. :(
Report Inappropriate Comment
Are you sure you would like to report this comment? It will be flagged for our moderators to take action.
Thank you for taking the time to improve the content on our site.

