Hanging Magnetic and Dry Erase Board
 Visit Stacey at Busting Stitches.
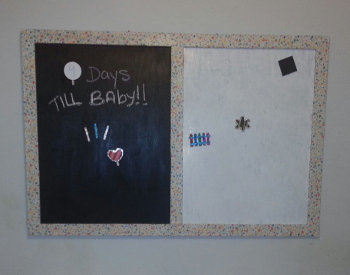
Your baby's room won't be complete without this Hanging Magnetic Chalkboard. Be sure to leave some space in a nursery for wall decor crafts like this one - it's a great way to add a personal touch. Use magnetic paint and meaningful embellishments for this unique home decor craft. While it takes a few days to complete this project, the piece itself will turn into a keepsake and last a lifetime.
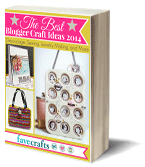
You can find this project, as well as many other fabulous blogger projects, in our new eBook, The Best Blogger Craft Ideas 2014: Decoupage, Sewing, Jewelry Making, and More free eBook. Download your own free copy today!

Materials:
- David Tutera Rhinestones
- Fiskars Scissors
- I Love to Create liquid fusion
- Tulip Fashion Glitter
- Plaid Chalkboard paint
- Mod Podge (paper and matte)
- Tulip beads in a bottle
- Hardboard, wood, and scrapbook paper
- Phoomph and fabric
- Rustoleum magnetic paint
- Rustoleum dry erase board paint
- Nails and staple gun
- Wooden shapes
- Magnets
- Clothespins
- Frame hangers
Instructions:
- Nail wood frame together.
- Paint seven coats on both 27" x35" in hardboards.
- Cut scrapbook paper into random shapes and paste each piece individually with modpodge. Apply a coat of the matte mod podge when finished.
- Apply five coats of dryerase paint to one board and 2 coats of chalkboard paint to the other.
- Drill boards to the frame and add picture frame hangers.
- Take wooden shapes and glue magnets and/or clothes pins to the ones of your choosing.
- Apply phoomph to some of the pieces. Press firmly. Then apply fabric. Cut the shapes out. Apply rhinestones to edges of those shapes.
- Apply rhinestones to some of the clothespins.
- Paint one shape with dry erase paint and the other with chalk board paint.
- Hang the frame and add the magnets.

Read NextMosaic Wall

