Felt Cookie Cutter Ornaments
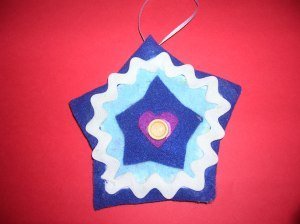
There are tons of crafts to make using cookie cutters, like these Felt Cookie Cutter Ornaments! These cute felt ornaments can be made with a sewing machine or a glue gun...whichever technique you prefer. These would be cute on packages, too!

Materials:
- Fabric or Felt
- Cotton or fiberfill or quilt batting
- Trims: lace, rick-rack, ribbon, yarn, etc.
- Embellishments: buttons, beads, etc.
- Large cookie cutters
- Newsprint
- Pins
- Sewing machine or needle & thread (if sewing)
- Thread (if sewing)
- Fabric glue (if gluing)
- Paper clips (if gluing)
Instructions:
- Trace each cookie cutter onto newsprint to make a pattern.

- Double the fabric with the patterned side on the outside for both sides and then pin the pattern to holiday fabric (such as a Christmas calico) or felt so that you cut out two matching pieces for each shape.

- With the right (patterned) sides together, sew each ornament by hand or machine, leaving a small space open for turning. If gluing, apply a line of fabric glue around the wrong side edge of the bottom shape.
- Turn ornament right side out.
- Stuff lightly with cotton or fiberfill.
- Hand-stitch the opening closed.
- Cut several slightly smaller shapes from the batting (make a copy of the pattern and then trim it down about 3/4ths of an inch. Also cut several squares of batting that fit in the center of the batting shapes to give a little more dimension to the ornament.
- Lay quilt batting in the center of the shape. Or place a ball of cotton or fiberfill in the center of the shape.
- Decorate with felt shapes, buttons, ribbon, rick rack or lace as desired.

- Sew a yarn, ribbon or string loop at the top of each ornament and it’s ready to hang on the Christmas tree.
Read NextChristmas Cone Ornament

