Quilted Paper DIY Wall Art
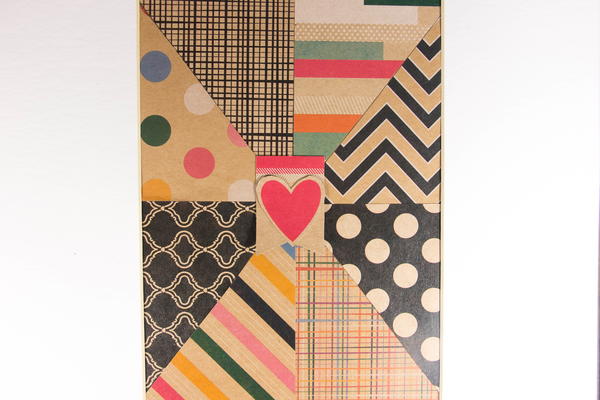
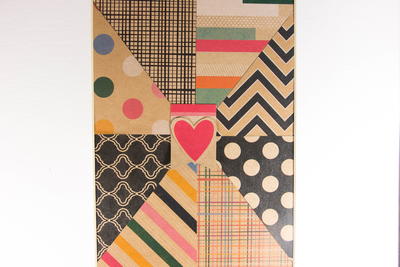
Sewing a quilt is so yesterday. Make Quilted Paper DIY Wall Art using coordinated paper to create a one-of-a-kind DIY wall hanging. This project may sound complicated but it's actually super simply to complete. Use only a few easy-to-find materials, you can create a unique design that looks like a fancy quilt. If you don't know how to sew, this is a great alternative. You only need paper, scissors and glue for this project, so it's perfect for anyone who doesn't want to invest in expensive supplies.
Primary TechniquePaper Crafts

Materials:
- Coordinating patterned paper
- Ruler and pencil
- Frame and mat
- Cardstock – 2 pieces
- Scissors
- Glue
Instructions:
- For 8” X 10” mat and frame, cut 2 pieces of cardstock to 8 ½” X 11”.
- Using ruler and pencil, find the middle of the paper.
- Create 4 equal rectangles.
- Mark out triangles in each quadrant, through the center creating 8 pieces.
- Cut out each piece and use as the template to cut a piece of patterned paper.
- Begin laying each piece of patterned paper into the same section on the other piece of cardstock, building your paper quilt.
- Adhere down with glue.
- Cut out cute accent from the patterned paper and add to center.
- Remove glass from frame.
- Once the quilt is dry, add to the frame and mat.
Read NextMosaic Wall

