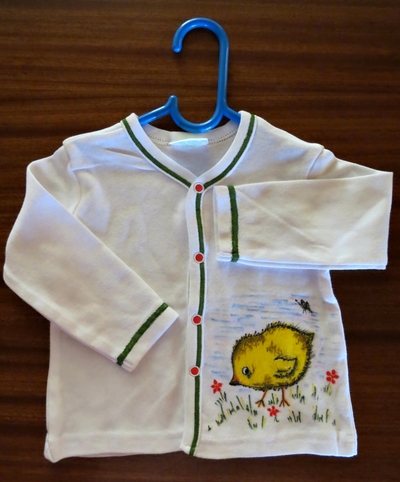
The Lowther Romper

If you are looking for the perfect play outfit and want to test your skills, then this one is for you. The romper is oversized and comfortable to wear and has been designed with play in mind. This design is made with basic stitches but includes some increasing and decreasing. If you are a confident beginner, give this project a go; you won’t be disappointed.
Construction
The romper is made in the round from the chest down. The legs are worked onto the body of the romper followed by a panel which sits between the legs. The front and back bibs are worked onto the chest and finally the straps are completed. There is a seam to sew between the legs.
Sizes
0–3 months 3–6 months 6–12 months 1–2 years 2–3 years
The sizes are color coded. Follow the instruction and stitch count highlighted in the relevant color for the size you are making.
Romper Measurements
Chest – 19 21 22 25 26 inches / 48 52 56 63 66 cm
Length – 14.5 16 17 18.5 19 inches / 36 40 43 46 48 cm
The length is measured from the top of the strap to the crotch.
Pattern Notes
- The Ch1 at the end of each row/round does not count as a stitch.
- When working in the round, work your first stitch into the full stitch (not into the base of the chain). The last stitch of the round is worked into the base of the turning chain. This will ensure you have a straight seam.
Techniques
- Joining with a slip stitch / working in the round
- Applied ribbing
- Joining the ribbing
- Work into front loop only

Materials List
-
Yarn
- DK Weight
- Paintbox Cotton DK in the shade 472 Jewel (100% Cotton)
- 137 yards / 125 meters per 1.7 oz / 50 g ball
Find this yarn on lovecrafts.com or visit yarnsub.com for comparable alternatives. You can use any DK weight yarn in the fiber of your choice. Make sure to check your gauge before you begin.
Yarn Amounts
- 411 449 507 558 711 yards / 375 410 463 510 650 meters
-
Gauge
- 3.5mm hook or size needed to obtain gauge
- 4x4 inches (10x10 cm) = 18 HDC sts and 12 rows
-
Hook
- 3.5mm
-
Notions
- Yarn needle, scissors, stitch markers and 4 buttons
Note – The buttons should measure approximately 0.6 inch (1.5 cm) in diameter.
INSTRUCTIONS
-
Let’s get started.
Using the 3.5mm hook, start by chaining 87 95 103 115 121.
Round 1 (RS) – HDC into the 2nd chain from hook and then into each chain. Join with a SlSt to the top of the first HDC to create a ring. Ch1 and turn. 86 94 102 114 120 sts
Round 2 (WS) (Increase round) – Work a HDC into the first 5 6 7 8 9 sts. BPDC around the post of the next stitch. Work 2HDC into the next stitch. HDC 29 31 33 37 38. Work 2HDC into the next stitch. BPDC. HDC 10 12 14 16 18. BPDC. Work 2HDC into the next stitch. HDC 29 31 33 37 38. Work 2HDC into the next stitch. BPDC. HDC into the last 5 6 7 8 9 sts. Join with a SlSt to the first HDC. Ch1 and turn. 90 98 106 118 124 sts
Note – The FPDC or BPDC sts in the following rounds are worked around the BPDC or FPDC sts from the previous round.
Round 3 – HDC 5 6 7 8 9. FPDC. HDC 33 35 37 41 42. FPDC. HDC 10 12 14 16 18. FPDC. HDC 33 35 37 41 42. FPDC. HDC 5 6 7 8 9. Join with a SlSt to the first HDC. Ch1 and turn. 90 98 106 118 124 sts
Round 4 (Increase round) – HDC 5 6 7 8 9 sts. BPDC. 2HDC. HDC 31 33 35 39 40. 2HDC. BPDC. HDC 10 12 14 16 18. BPDC. 2HDC. HDC 31 33 35 39 40. 2HDC. BPDC. HDC 5 6 7 8 9. Join with a SlSt to the first HDC. Ch1 and turn. 94 102 110 122 128 sts
Round 5 – HDC 5 6 7 8 9. FPDC. HDC 35 37 39 43 44. FPDC. HDC 10 12 14 16 18. FPDC. HDC 35 37 39 43 44. FPDC. HDC 5 6 7 8 9. Join with a SlSt to the first HDC. Ch1 and turn. 94 102 110 122 128 sts
If you are making 0–3 months please go to the next section, “Continue the body.”
Round 6 (Increase round) – HDC 6 7 8 9 sts. BPDC. 2HDC. HDC 35 37 41 42. 2HDC. BPDC. HDC 12 14 16 18. BPDC. 2HDC. HDC 35 37 41 42. 2HDC. BPDC. HDC 6 7 8 9. Join with a SlSt to the first HDC. Ch1 and turn. 106 114 126 132 sts
If you are making 3–6 months please go to the next section, “Continue the body.”
Round 7 – HDC 7 8 9. FPDC. HDC 41 45 46. FPDC. HDC 14 16 18. FPDC. HDC 41 45 46. FPDC. HDC 7 8 9. Join with a SlSt to the first HDC. Ch1 and turn. 114 126 132 sts
If you are making 6–12 months please go to the next section, “Continue the body.”
Round 8 (Increase round) – HDC 8 9 sts. BPDC. 2HDC. HDC 43 44. 2HDC. BPDC. HDC 16 18. BPDC. 2HDC. HDC 43 44. 2HDC. BPDC. HDC 8 9. Join with a SlSt to the first HDC. Ch1 and turn. 130 136 sts
If you are making 1–2 years please go to the next section, “Continue the body.”
Round 9 – HDC 9. FPDC. HDC 48. FPDC. HDC 18. FPDC. HDC 48. FPDC. HDC 9. Join with a SlSt to the first HDC. Ch1 and turn. 136 sts -
Continue the body.
Round 1 – Work a HDC into each stitch, join with a SlSt to the first HDC. Ch1 and turn. 94 106 114 130 136 sts
Round 2 – Repeat round 1. 94 106 114 130 136 sts
Round 3 (Increase round) – HDC 6 7 8 9 10 sts. 2HDC. HDC 33 37 39 45 46. 2HDC. HDC 12 14 16 18 20. 2HDC. HDC 33 37 39 45 46. 2HDC. HDC 6 7 8 9 10. Join with a SlSt to the first HDC. Ch1 and turn. 98 110 118 134 140 sts
Rounds 4 and 5 – Repeat round 1. 98 110 118 134 140 sts
Round 6 (Increase round) – Sizes 0–3 months, 3–6 months and 6–12 months only. HDC 6 7 8 sts. 2HDC. HDC 35 39 41. 2HDC. HDC 12 14 16. 2HDC. HDC 35 39 41. 2HDC. HDC 6 7 8. Join with a SlSt to the first HDC. Ch1 and turn. 102 114 122 sts
Round 6 – Sizes 1–2 years and 2–3 years only. Work a HDC into each stitch; join with a SlSt to the first HDC. Ch1 and turn. 134 140 sts
Round 7 – Work a HDC into each stitch; join with a SlSt to the first HDC. Ch1 and turn. 102 114 122 134 140 sts
Repeat round 7 a further 15 16 15 16 15 times. You should have completed a total of 27 29 29 31 31 rounds. You can choose to add extra rounds here if you wish to increase the length of the romper. At the end of the last round, fasten off. -
Complete the front bib.
The front bib is worked into the starting chain at the beginning of the body. The front bib is worked into all the stitches across the front and the back bib is worked into all the stitches along the back.
Row 1 – Working on the wrong side (or inside) of the romper, attach yarn to the first stitch from the joining seam. Ch1 and HDC into this stitch. HDC into the next 4 5 6 7 8 sts. Work a BPDC around the next stitch (work it around the post stitch from round 2). Work HDC2tog. HDC 27 29 31 35 36. Work HDC2tog. BPDC. HDC 5 6 7 8 9. Ch1 and turn. 41 45 49 55 58 sts
Row 2 – HDC 5 6 7 8 9. FPDC. HDC2tog. HDC 25 27 29 33 34. HDC2tog. FPDC. HDC 5 6 7 8 9. Ch1 and turn. 39 43 47 53 56 sts
Row 3 – HDC 5 6 7 8 9. BPDC. HDC2tog. HDC 23 25 27 31 32. HDC2tog. BPDC. HDC 5 6 7 8 9. Ch1 and turn. 37 41 45 51 54 sts
Row 4 – HDC 5 6 7 8 9. FPDC. HDC2tog. HDC 21 23 25 29 30. HDC2tog. FPDC. HDC 5 6 7 8 9. Ch1 and turn. 35 39 43 49 52 sts
Row 5 – HDC 5 6 7 8 9. BPDC. HDC2tog. HDC 19 21 23 27 28. HDC2tog. BPDC. HDC 5 6 7 8 9. Ch1 and turn. 33 37 41 47 50 sts
Row 6 – HDC 5 6 7 8 9. FPDC. HDC2tog. HDC 17 19 21 25 26. HDC2tog. FPDC. HDC 5 6 7 8 9. Ch1 and turn. 31 35 39 45 48 sts
Row 7 – HDC 5 6 7 8 9. BPDC. HDC2tog. HDC 15 17 19 23 24. HDC2tog. BPDC. HDC 5 6 7 8 9. Ch1 and turn. 29 33 37 43 46 sts
Row 8 – HDC 5 6 7 8 9. FPDC. HDC2tog. HDC 13 15 17 21 22. HDC2tog. FPDC. HDC 5 6 7 8 9. Ch1 and turn. 27 31 35 41 44 sts
Row 9 – HDC 5 6 7 8 9. BPDC. HDC2tog. HDC 11 13 15 19 20. HDC2tog. BPDC. HDC 5 6 7 8 9. Ch1 and turn. 25 29 33 39 42 sts
If you are making 0–3 months, please go to the next section, “Remainder of the bib.”
Row 10 – HDC 6 7 8 9. FPDC. HDC2tog. HDC 11 13 17 18. HDC2tog. FPDC. HDC 6 7 8 9. Ch1 and turn. 27 31 37 40 sts
If you are making 3–6 months, please go to the next section, “Remainder of the bib.”
Row 11 – HDC 7 8 9. BPDC. HDC2tog. HDC 11 15 16. HDC2tog. BPDC. HDC 7 8 9. Ch1 and turn. 29 35 38 sts
If you are making 6–12 months, please go to the next section, “Remainder of the bib.”
Row 12 – HDC 8 9. FPDC. HDC2tog. HDC 13 14. HDC2tog. FPDC. HDC 8 9. Ch1 and turn. 33 36 sts
If you are making 1–2 years, please go to the next section, “Remainder of the bib.”
Row 13 – HDC 9. BPDC. HDC2tog. HDC 12. HDC2tog. BPDC. HDC 9. Ch1 and turn. 34 sts -
Remainder of the front bib.
Row 1 – Work a HDC into each stitch. Ch1 and turn. 25 27 29 33 34 sts
Row 2 (Create the buttonholes) – Work a HDC into the first 2 sts. Ch1 and skip the next stitch. HDC 2. SC 15 17 19 23 24. HDC 2. Ch1 and skip the next stitch. HDC into the last 2 sts. Ch1 and turn. 25 27 29 33 34 sts
Row 3 – Work a HDC into the first 5 stitches. SC 15 17 19 23 24. HDC into the last 5 sts. Fasten off. 25 27 29 33 34 sts -
Complete the back bib.
The back bib is worked into all the remaining stitches along the back side of the romper.
Row 1 – Working on the wrong side or inside of the romper, attach yarn to the first unworked stitch. Ch1 and work a HDC into this stitch. HDC into the next 4 5 6 7 8 sts. Work a BPDC around the next stitch (work it around the post stitch from round 2). Work HDC2tog. HDC 27 29 31 35 36. Work HDC2tog. BPDC. HDC 5 6 7 8 9. Ch1 and turn. 41 45 49 55 58 sts
Repeat the instructions for the front bib until you have completed row 9 10 11 12 13. -
Remainder of the back bib.
Row 1 – Work a HDC into each stitch. Ch1 and turn. 25 27 29 33 34 sts
Row 2 – HDC 5. SC 15 17 19 23 24. HDC 5. Ch1 and turn. 25 27 29 33 34 sts
Row 3 – HDC 5. SC 15 17 19 23 24. HDC 5. Ch1 and turn. (Do not fasten off.) 25 27 29 33 34 sts -
Complete the straps.
Row 1 – Work a HDC into the first 5 6 7 8 9 sts. Ch1 and turn.
Repeat step 1 until you have completed a total of 16 18 20 22 24 rows. Fasten off.
To complete the second strap, attach yarn (please ensure you are working on the same side as the first strap) to the opposite side of the back bib. Mark out the 5 6 7 8 9 sts and attach to the first or last stitch depending on the side you are working from. Complete the same number of rows for this strap. Fasten off. -
Create the first leg.
Lay the romper flat, right side facing you. Place stitch markers centrally, across the bottom of the body as follows.
Count in 22 25 26 29 30 sts from the seam. Place a marker in this stitch. Now skip 7 7 9 9 10 sts and place a marker into the next stitch. Now skip 42 48 50 56 58 sts and place a marker into the next stitch. Now skip 7 7 9 9 10 sts and place a marker into the next stitch.
You should have 21 24 25 28 29 sts remaining before the joining seam.
When placed correctly, you should have 7 7 9 9 10 sts between the two markers (front and back of romper), which will form the crotch, and 42 48 50 56 58 sts between the markers around the sides of the romper, which will form the legs. Total stitches including the 4 marked stitches will total 102 114 122 134 140.
Note – If you finished the body of the romper on a right side row, you will attach the yarn on the wrong side (inside). If you finished the body on a wrong side row, you will attach on the right side.
Row 1 – Attach yarn into the marked stitch. Ch1 and work a HDC into this stitch. Now work a HDC into the next 42 48 50 56 58 sts. Work your last HDC into the marked stitch. Ch1 and turn. 44 50 52 58 60 sts
Row 2 – Work a HDC into the first stitch. Work HDC2tog. Now work a HDC into each stitch until you have 3 sts remaining. Work HDC2tog and then work a HDC into the last stitch. Ch1 and turn. 42 48 50 56 58 sts
Repeat row 2 a further 5 6 7 8 9 times. At the end of each row your stitches will be reduced by 2. At the end of row 7 8 9 10 11, you will have 32 36 36 40 40 sts. Ch1 and turn.
Row 8 9 10 11 12 – Work a HDC into each stitch. Fasten off. 32 36 36 40 40 sts
Repeat this section to complete the second leg. Attach the yarn as shown in Photo D. -
Create the crotch and join the legs.
We will begin by working on the front edge.
Row 1 – Working on the right side, attach yarn into the inner side of row 8 9 10 11 12. Ch1 and work a SC into the side of the row. Now work a SC into the edge of each HDC row of the leg until you reach the 7 7 9 9 10 sts we skipped for the crotch. Work a SC into the corner and then work a SC into each of the 7 7 9 9 10 sts. Now work a SC into the next corner and then work a SC into the edge of each HDC row down the opposite leg. If you feel you need to add more stitches (than one per row), then please do so but please ensure that you have the same number of stitches on the edge of both legs. Ch1 and turn.
Row 2 – Work a SC into the front loops only of each stitch. Ch1 and turn.
Row 3 – Work a SC into each stitch (working through both loops). Ch1 and turn.
Row 4 – Work a SC into each stitch. Fasten off. We will now complete the back of the crotch.
Turn the romper over so you have the back edge facing you.
Repeat row 1 only in exactly the same way you did on the front edge of the romper. (Please ensure you have the same number of stitches.) Fasten off, leaving a long tail for sewing the two sides together. Turn the romper inside out and, using a yarn needle, sew up the two sides using your preferred method. I recommend attaching only the inside loop from each side. Using this technique results in a nice, neat finish. -
Complete the leg ribbing.
To work the ribbing on the base of the legs, attach yarn on the right side, at the seam and Ch8. Work a SC into the 2nd chain from the hook and then into the remaining 6 chains. You can choose how wide you would like your ribbing to be simply by creating more or fewer chains. Continue to work the ribbing all around the base of the leg. Work the second leg in the same way. -
Finishing off.
Sew up the seams, weave in your ends and sew on your buttons.
Credit:
Reprinted with permission from Lovely Little Stitches by Karen Petry. Page Street Publishing Co. 2024. Photo credit: Tanya Zeiss.
Read NextNo Sew Baby Hat