This project was submitted by one of our readers, just like you.
Wire-Wrapped Princess Tiara
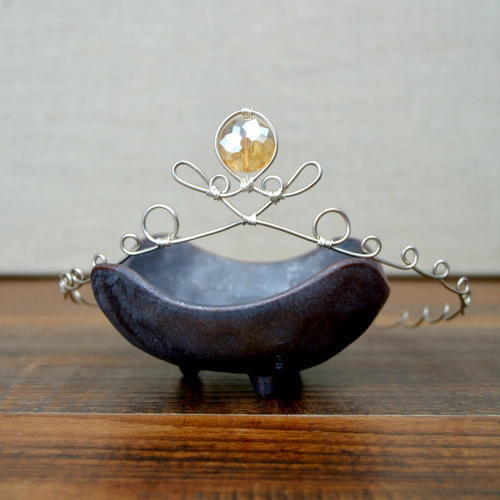
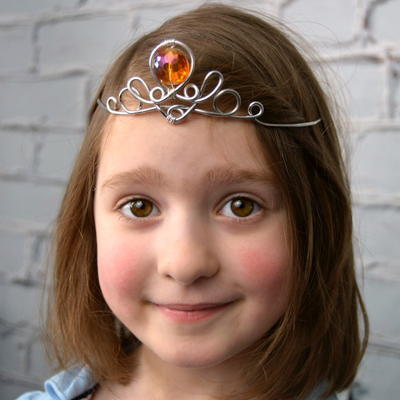
This how to make a tiara tutorial is an easy craft project with royalty-worthy results.
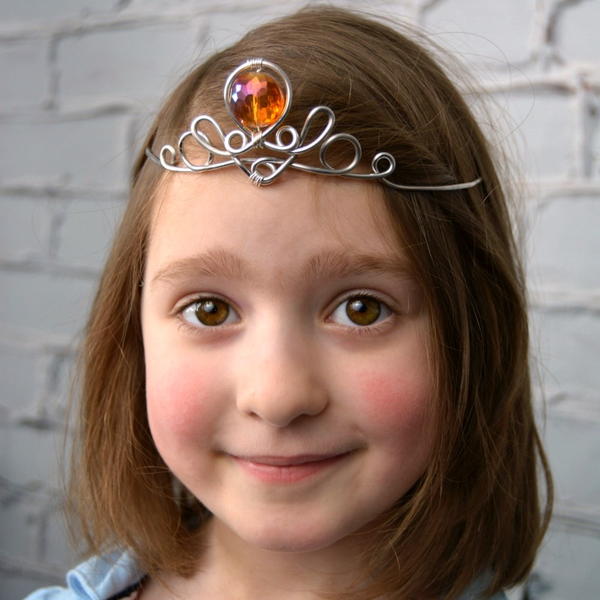
In the Designer's Words: "This wire wrapped tiara costs less than $5 in supplies to make, using 12-14 gauge wire and a single focal bead. The loops on the crown were created easily on the Beadalon Thing-A-Ma-Jig, and beginner wire wrappers with a little experience can make this magical project at home in about 30 minutes. It's a perfect gift to your little princess! The beauty of this project is the simplicity of the components that make it up. Just wire and tools can be formed into jewelry and accessories for fans of any age!"
Making DIY hair accessories is a lovely way to combat bad hair days, but it is also a fun way to play pretend! This how to make a tiara tutorial is simple, easy, and will easily be the envy of all the little girls on the block. Designed for little girls, the Wire-Wrapped Princess Tiara could easily be transformed into something for a big girl, too. Perfect for prom or just playing pretend, this wire craft idea will make your girl's day. Make sure to save this craft project idea for Halloween!
Project TypeMake a Project
Bead TypeCrystal
Time to CompleteUnder an hour
Bead Technique UsedChainmail/Wirework
Bead Project TypeHair Accessory, Other

Materials List
- 2m (6 feet)12-gauge aluminum wire OR 14-gauge tinned copper wire
- 1m (3 feet) 24-gauge silver plated copper wire
- Beadalon Thing-A-Ma-Jig
- 18mm Round Crystal Bead
- Wire Cutters
- Nylon Jaw Pliers
- Bent Nose Pliers
Instructions
-
Begin by laying out your crown design on the thing-a-ma-jig. You will create this pattern by wrapping loops of wire around various sized loops and mandrels provided in the jig kit. Take a few moments to practice your wrapped design with a piece of string if you are new to wire wrapping.
-
Cut a 2m (6 foot) piece of 12-gauge aluminum or 14-gauge tinned copper wire. At the center point of the wire, begin the topmost point of your crown's design. Wrap the wire along the pins and mandrels, creating your crown's pattern. Once wrapped, use the side of a pair of bent nose pliers to press all loops lose to the jig surface and flatten your design as much as possible.
-
Remove the center of the crown from the jig. Optionally, reset the pins to create a spiral or loop design along the sides of the crown. Repeat as necessary.
-
Measure the fully-wrapped design. Adult sized crowns should be approximately 24 inches round and child sizes between 20-22 inches, though this measurement can be custom fit to any size! Add a length of TWO INCHES to the final crown size, and cut away excess wire. Be sure the crown is centered along the wire.
-
Form the trimmed wire into a round shape, overlapping the two ending points by two inches. Cut 18 inches of 24 gauge silver plated copper wire, and wrap it over the overlapping wires, covering them. This will secure the backside of the design. (Alternately, crimp wire connectors can be used in this step, simply trim the wire from to the finished size, and crimp the ends together.)
-
Cut 6-8 inch segments of 24 gauge wire, and on the front of the tiara, wrap intersecting wires with 5-6 loops to stabilize the design. Trim excess wire away.
-
To add a bead (or beads), wrap the top loop of the location with 5-6 wraps of wire. String the bead on, and fit it into place. Secure the bottom with 5-6 wraps of wire. Trim excess wire away.
-
File any sharp edges of wire before allowing children to wear or play with the crown, and watch them enjoy playing royalty!
Read NextWire and Fabric DIY Headband
Your Recently Viewed Projects
EditorLP
Mar 31, 2016
This handmade tiara is so precious! Sadly I don't have any little girls in my family to make this for yet, so maybe I'll just have to make it for myself.
Report Inappropriate Comment
Are you sure you would like to report this comment? It will be flagged for our moderators to take action.
Thank you for taking the time to improve the content on our site.

