Santa Glass Ornament
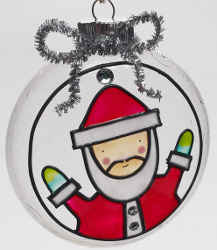
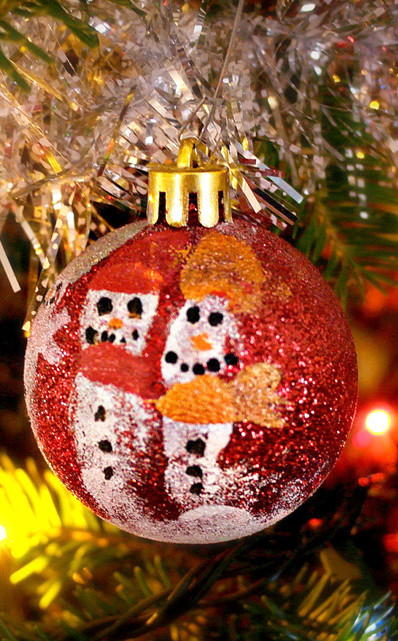
This lovely Santa Glass Ornament can be hanging from your tree this holiday season. Just follow the easy steps and you'll have this wonderful Christmas craft. It's both impressive and simple to make.

Materials:
Plaid Supplies-
- 16001 - Gallery Glass ® Window Color™ - Crystal Clear, 2 oz.
- 16002 - Gallery Glass ® Window Color™ - Snow White, 2 oz.
- 16015 - Gallery Glass ® Window Color™ - Ruby Red, 2 oz.
- 16020 - Gallery Glass ® Window Color™ - Amber, 2 oz.
- 16022 - Gallery Glass ® Window Color™ - Clear Frost, 2 oz.
- 16035 - Gallery Glass ® Window Color™ - Lime Green, 2 oz.
- 16051 - Gallery Glass ® Surfaces - Leading Blanks
- 16076 - Gallery Glass ® Liquid Leading™ - Black, 4 oz.
- 16423 - Gallery Glass ® Window Color™ - Hot Pink, 2 oz.
- 17049 - Gallery Glass ® Window Color™ - Aqua, 2 oz.
Other Supplies-
- Medium size clear gem
- 2 small clear gems
- 4” round compressed glass ornament
- ¼” stencil brush
- Glue
- Black Ultra Fine black marker
- Combing tool/nut pick
- Silver tinsel chenille stem
Instructions:
- Create lead lines on leading blank. Let dry at least twelve hours.
- Use lead lines to create head and gloves on blank. Use small dot of leading from bottle to seal where joints meet. When dry, apply window color. Face is made mixing Amber and Hot Pink.
- Place lead line around outer edge of from of ornament as shown. Place head and gloves when dry inside circle. Use rest of lead lines to create body. When dry, fill in body with window color.
- Apply Clear Frost with stencil brush to rest of ornament. When dry, lightly draw swirls with Crystal Clear over frost.
- Glue gems to hat and front of Santa. Apply eyes and mouth with marker.
- Wrap chenille stem around top of ornament and twist into bow.
Read NextHeart Felt Ornaments Tutorial
Your Recently Viewed Projects
Report Inappropriate Comment
Are you sure you would like to report this comment? It will be flagged for our moderators to take action.
Thank you for taking the time to improve the content on our site.

