Spring Accordion Wallet
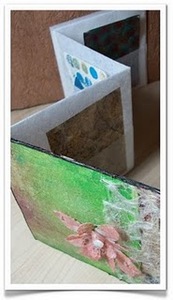
Create this spring-themed accordion wallet to hold artist trading cards, business cards, photos or mementos. This accordion wallet designed by Lisa Fulmer looks lovely on a table-top for spring decorating.


Materials:
- 16"x12" sheet of lutradur (large 22"x30" sheets are available at many art materials stores or yardage off the bolt can be purchased at some fabric stores)
- one 4" square piece of lutradur
- three small squares of lutradur - 2.5", 2", 1.5"
- two 4" square pieces of chipboard
- assorted acrylic paint colors
- iridescent medium
- spray mist paint
- deckled paper accents
- 3-in-1 craft glue
- heat gun, large tweezers, small shell, paint marker
Instructions:
-
Fold the large sheet of lutradur in half, lay it in front of you with the fold edge at the top, then flip up 2" of the bottom edge toward the center fold and press. turn over and repeat for the other side. see diagram below.
-
Accordion-fold your folded strip into four 4"x4" sections. see diagram below.
-
Adhere a piece of chipboard to each end of your accordion-folded pockets. add glue to seal the edges of pockets. set aside.
-
Paint the 4" square piece of lutradur for the wallet cover. i used green, yellow, bronze, red and blue, randomly brushing and blending the colors. paint will seep through the lutradur, so be sure to work on top of another sheet of paper. Allow to dry.
-
Paint a coat of iridescent medium on top of color. allow to dry.
-
Glue a strip of deckle accent paper to one side of the cover.
-
From each of the smaller lutradur squares, cut out a simple four-pointed flower shape.
-
Adhere the 3 flower shapes on top of each other with craft glue in the center (small, then medium, then large), rotating the petal on each layer.
-
Pick up the flower with the tweezers and briskly wave the heat gun over the petals to melt and distress - careful not to get too close and melt the whole petal away!
-
Spritz the flower with desired color of spray mist paint and adhere the shell to the center, set aside.
-
Adhere the painted cover to the front piece (either end can be designated as the front) of chipboard, allow to dry under a book or other weighted object.
-
Repeat steps 4, 5, 6 and 11, if you want to decorate the back cover also. i left my back cover undecorated.
-
Adhere the flower to the front cover.
-
Use a paint marker to rim the edges of the cover with a contrasting color.
- Load up each pocket with atc's and tie a pretty ribbon around it to keep it shut when traveling. it also makes a nice free-standing atc display when spread out.


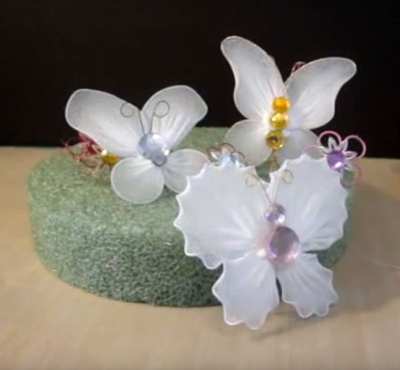
Read NextClutter of Nylon Butterflies
Your Recently Viewed Projects
karen52
Sep 09, 2010
We need more articles on artist trading cards and the other sizes. They're in right now so everyone almost wants to make them. Please write more articles. Karen Carroll
Report Inappropriate Comment
Are you sure you would like to report this comment? It will be flagged for our moderators to take action.
Thank you for taking the time to improve the content on our site.

