Classic Clay Necklace Tutorial
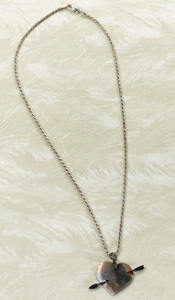
 Elevate your style to the height of sophistication with this Classic Clay Necklace Tutorial. Taking its inspiration from a basic shape, a heart, this guide on how to make polymer clay jewelry does not disappoint in its simplicity. In fact, you'll love the way this elegant pendant keeps the focus of the charm with its understated silver accents. This necklace is memorable and affordable, thanks to a tutorial that makes use of easily available craft supplies.
You can find this project, as well as many other fabulous blogger projects, in our new eBook, The Best Blogger Craft Ideas 2014: Decoupage, Sewing, Jewelry Making, and More free eBook. Download your own free copy today!

Materials:
- Polyform Sculpey clay and tools
- Darice embossing folder
- Darice adhesive rhinestone sheet
- Plaid Dimensional Magic
- 2 heart-shaped cookie cutters of different sizes
- Beads
- Wire
- Neck wire
Instructions:
- Knead clay until soft.
- On a clean surface, use a rolling pin to flatten out clay to desired thickness.
- Wrap flattened clay in plastic wrap. Gently press wrapped clay in an embossing folder. Remove plastic wrap.
- Use cookie cutter to cut a heart from the clay. Repeat this step with smaller heart cutter.
- Press smaller clay heart into larger one.
- Use a Sculpey tool to make two small holes at the top of heart.
- Bake heart according to package directions.
- Cut rhinestones from rhinestone adhesive sheet. Remove backing and stick rhinestones to heart.
- Cover the heart with a layer of Dimensional Magic and allow to dry completely.
- Use wire to attach the heart to a neck wire and decorate as desired with beads.
Read NextCross Necklace Kids Craft


